Vita Patch Installation
Prerequisites:
Modded Vita (If your Vita hasn't been modded yet, follow this guide.)
Physical or digital copy of the game
- Connect your Vita through FTP or USB (FTP is preferred as you can access the ur0: partition and the ux0: partition at the same time).
-
Install the RePatch Plugin.
a. Download repatch.skprx from the release page.
b. Move repatch.skprx into the ur0:tai/ folder of your Vita.
c. In the config.txt file which is located in the same folder, write “ur0:tai/repatch.skprx” under *KERNEL. Save the file and reboot. Your config.txt file should look something like this once you have installed the RePatch plugin (ignore all the other plugins in the image).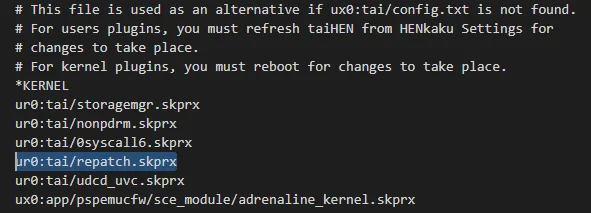
If your Vita doesn’t boot after you’ve edited config.txt, hold the L trigger while booting the Vita to skip loading plugins and reconnect your Vita to your pc to check to make sure you have everything written correctly.
d. Create a folder called “RePatch” in the ux0: directory of your Vita.
-
Copy over the RePatch folder from the patch you downloaded into the ux0: directory of your Vita. Replace any files if necessary.
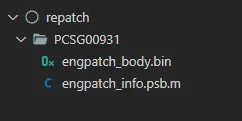
The structure of your RePatch folder should look something like this.
-
Run the game, and voilà! You've installed the patch. If everything was done correctly, your game should now be in English.
A video tutorial for this installation method is available here: